
 When I did this survey a couple weeks ago (thank you again from the bottom of my heart for all your amazing feedback!), I was so surprised and excited about how many people wanted to hear more about my photography tips. As any of my friends/strangers I encounter know, I’m such a photography nerd. It’s not my background at all (do psych or journalism apply to being a photo nerd or was this just a happy blogging accident?) but something I’ve grown increasingly passionate about over the years as it becomes more and more important to my life and livelihood!
I did do a pretty comprehensive photography 101 a few years ago and also have a recent travel photography tips feature and Insta editing tutorial, but thought I’d just catch you all up to speed with what I’m using and the basics you need to know before I delve into my go-to tips for each of the main styles I shoot in: portrait/outfit, landscape and detail shots. Now first things first…
The equipment
I’ve been using a Canon 6D for the past couple of years for definitely all of my outfit shots (and most of my other content) with a portrait lens – as you’ll see when we get into the basics, it has phenomenal depth of field and the quality is amazing! Would totally recommend it for anyone, though Canon has a more inexpensive SLR’s that are really easy to use (one of the things I love about Canon) and will get your foot in the door photography-wise if you’re not ready to invest in the 6D yet.
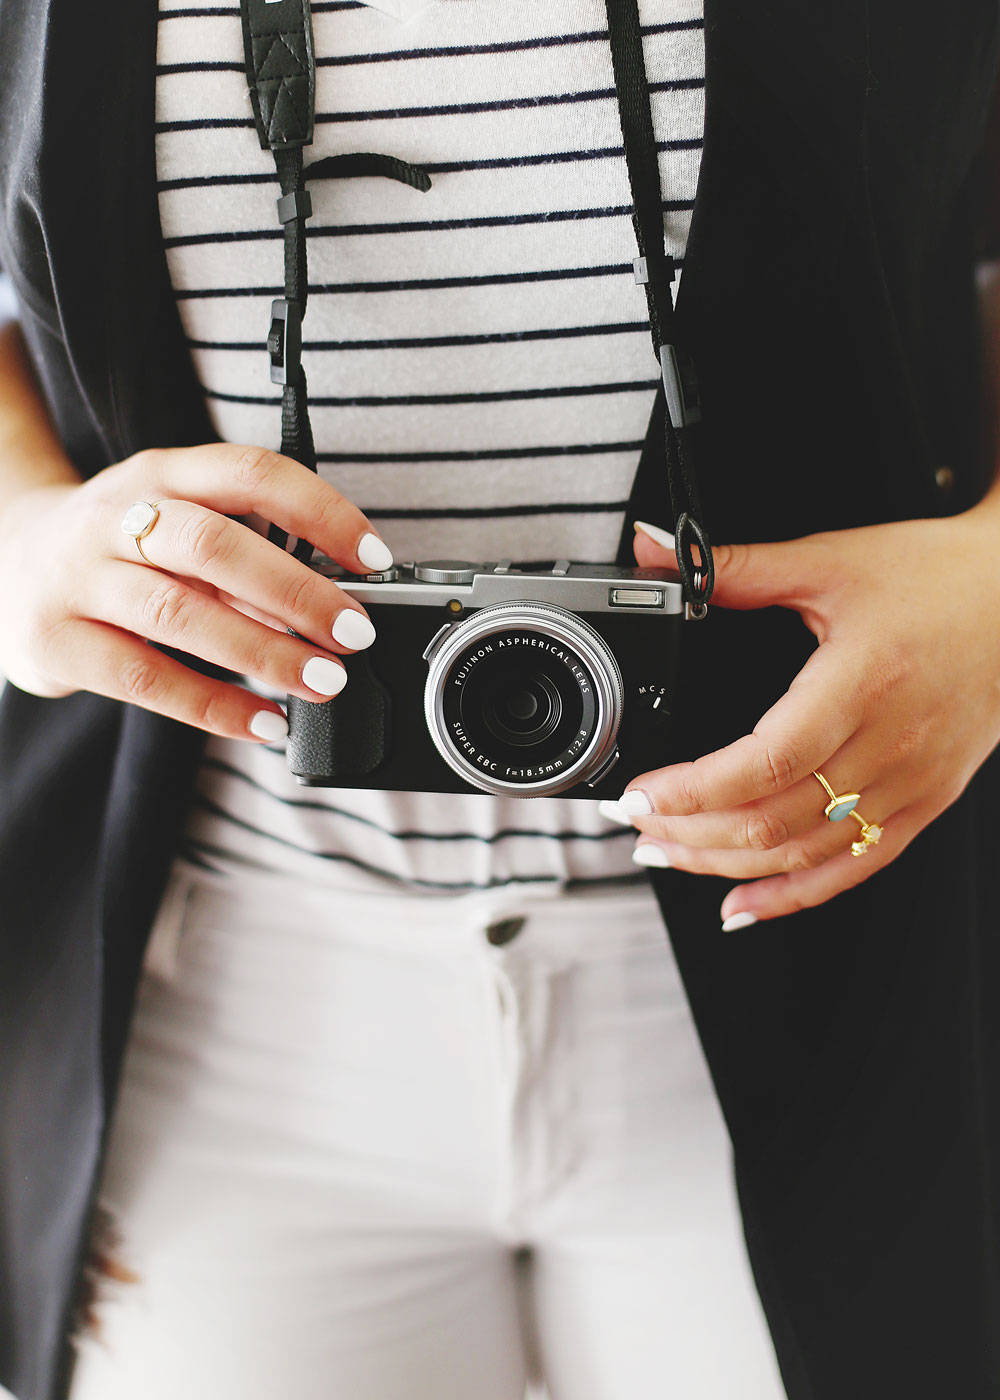
But recently, I also added a Fuji FX70 (pictured above, but taken with my Canon!) to my arsenal, and let me tell you , I’ve never made a better decision or investment. I wanted something with a fixed lens that I’d literally be able to slip into my pocket, purse, etc and travel with easily. I knew it needed to have excellent quality, to be able to shoot video really well too and to have a wireless connection so that I could transfer images over to my phone easily while on the road.
I’m actually (maybe surprisingly) not a big shopper, but when I want something, I will move mountains to get it and obsess until I do. Matt spent a very stressful few days with me while I hunted it down – ironically, I ended up finding it a couple blocks away from us at Broadway Camera and the second they placed the slightly retro model in my hand and I started shooting away, I basically was handing over my credit card (also big shoutout to everyone at Broadway Camera, their Fuji team was amazing!). Almost even more than an SLR, if you’re new to shooting I would recommend this beauty. If you take a look at my Instagram over the past couple of weeks, other than the outfit shots everything’s been shot on this beauty. Can’t wait for our big trip in October, my Finn the Fuji as I’ve named him (all my belongings are boys, anyone else?) is going to be so key!
But at the end of the day, the expression that the best camera you have is the one that’s on you is so true. I shot forever on my LG G4 and it takes fantastic pictures, and my iPhone 6S shoots incredibly. So if you’re still on the fence about investing, as long as you have a phone, you’re golden!
The basics
But if you do have a camera (and even on some phones, there’s the option to shoot manual), let’s just really quickly go over the basics of shooting.
Aperture
Aperture is the hole in your lens through which light travels – it’s measured in f-stop and manipulating the f-stop results in different depth of field. The smaller your f-stop (which kind of counterintuitively results in a larger aperture), the shallower your depth of field is.
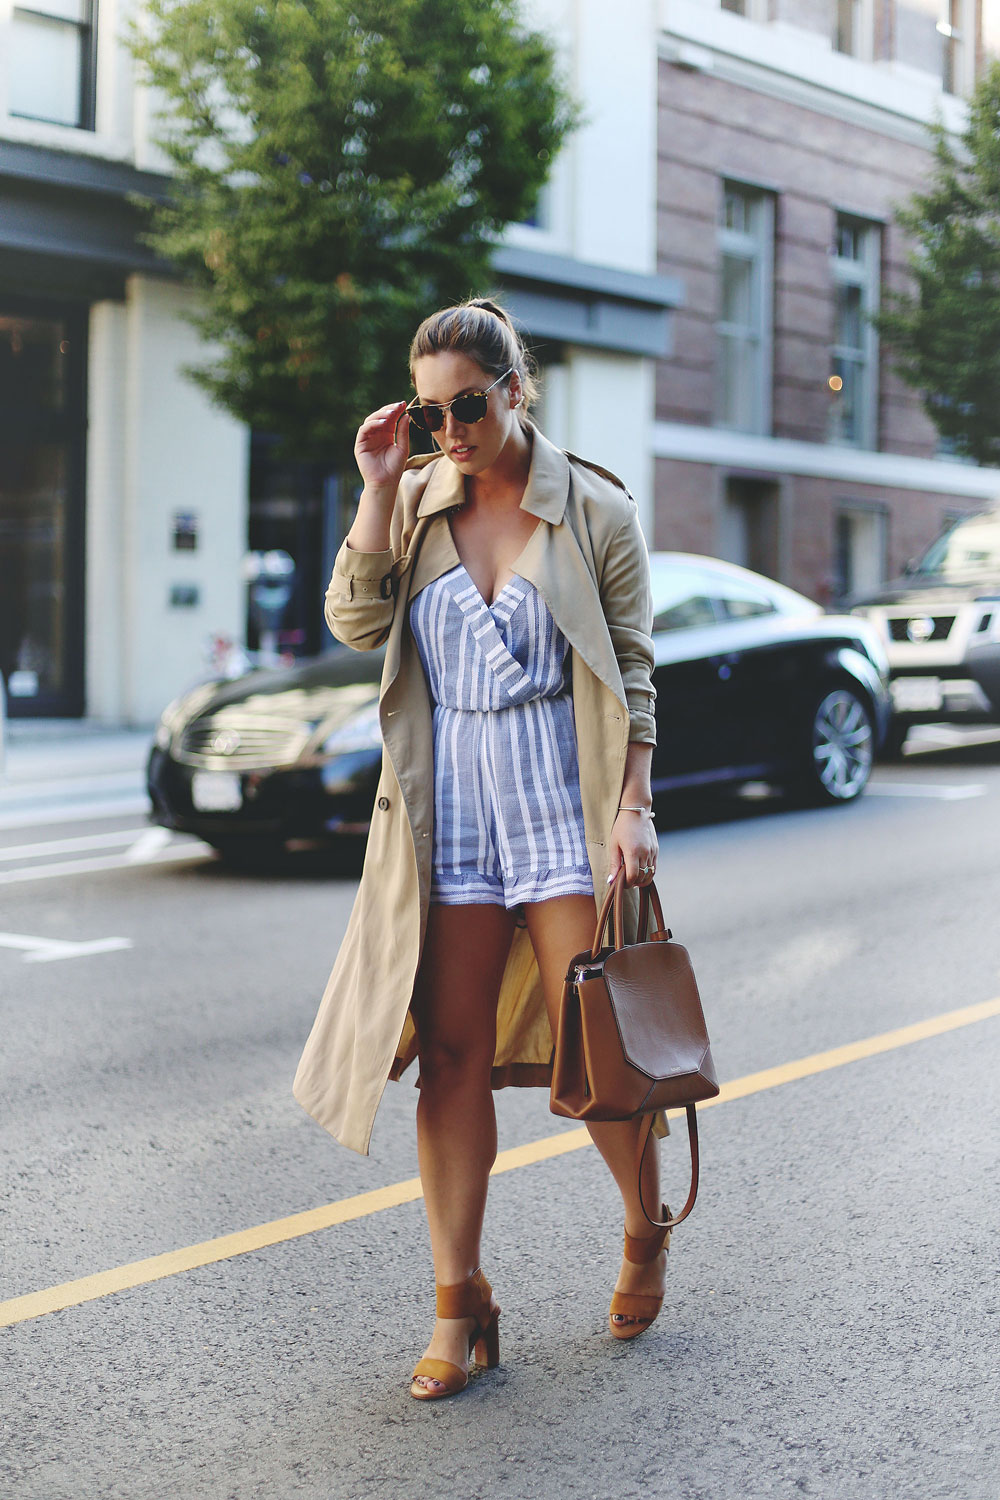
 This shot above was taken at an f-stop of about 1.8, so quite low. I tend to shoot at a much lower f-stop, especially when shooting outfit shots. As you can see, the depth of field is “shallow,” so to speak. The foreground (in this instance, me in Aritzia for the warehouse sale announcement) is crisp and in focus, while the background has that lovely bokeh, blurred out quality.
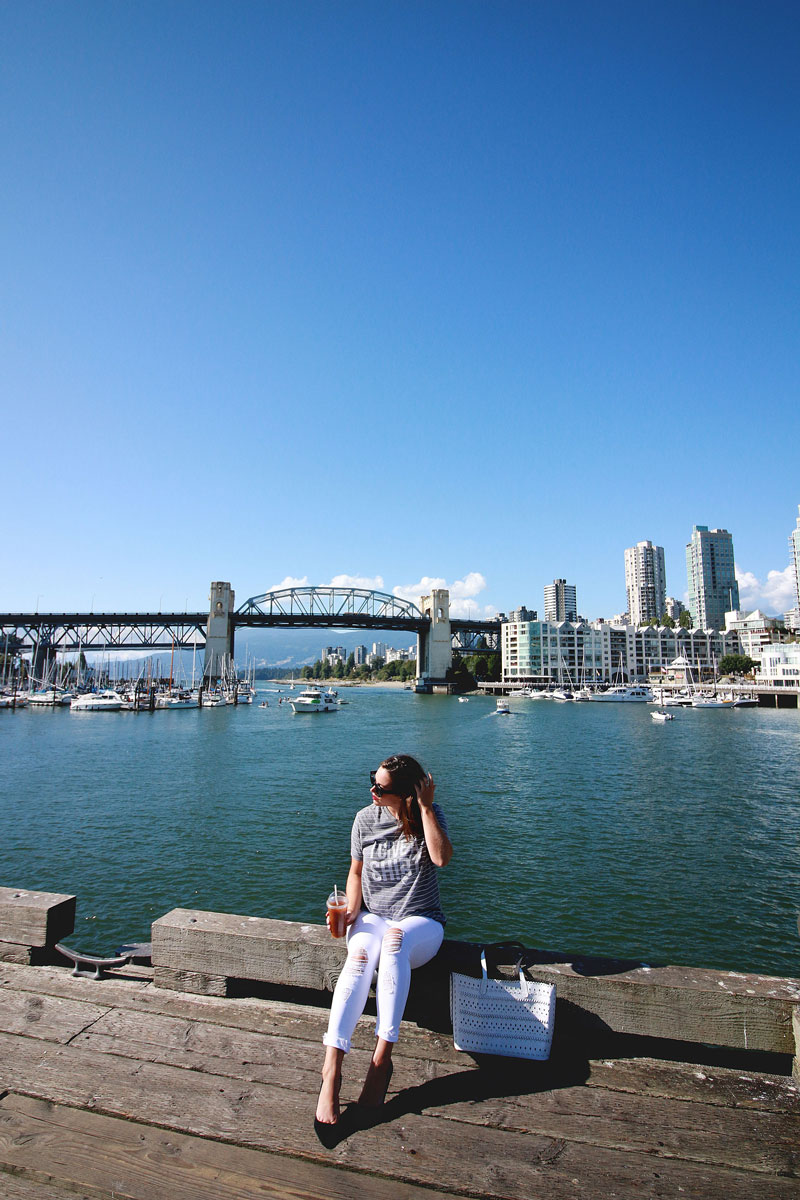
Conversely, this shot below was taken at a higher f-stop than I usually shoot at – something around f-stop 6 I believe. As you can see, the depth of field isn’t shallow at all – the background is just about as focused as I am. While I typically shoot at a lower f-stop, there are a few reasons I’d shoot at higher f-stops: landscape shots are great at a higher f-stop, some detail shots where I want everything in the shot focused, or here, where the background takes as much precedence as I do in the shot.
 Shutter speed
Shutter speed is pretty self-explanatory – it’s how long the shutter is open for based on the setting you have it at. I typically shoot between 1600-4000 as I try to always allow for a lot of light. The more light you have, the higher your shutter speed can (and should) be as light is flooding through your lens. But when you’re in lower light situations, you can drop the shutter speed down so that it allows more light in and brightens up the image. Best rule of thumb though is to always aim to shoot when you’ve got good light and you’ll save yourself a lot of trouble and the quality of your image!
Just a note that shutter speed is the only thing I usually change once I’ve determined my aperture (which for outfits, I typically keep at 1.8-2), my ISO (which I aim to keep as low as possible – more on that in a second) and white balance. Usually the closer someone is to you (and therefore potentially blocking out some of the light you’d get from wider frames), the more likely it is that you might have to bump your shutter speed down one or two settings to keep lighting consistent. Having said that, usually once I get lighting all set, I’m good to just keep shooting with next to no adjustments.
ISO
The best way to think of ISO is a more dramatic approach to changing lighting than shutter speed. Having said that, the lower your ISO, the better the image quality (again, best rule of thumb, try to shoot with decent light!). Though in the winter or sometimes for interior shots, I’ll bump my ISO up from its usual range between 100-200 to 400, even up to 600 sometimes. But really try to keep it as low as you can and remember that your images will always look darker on your viewer than on your computer or once edited!
White Balance
This is the one thing I typically always keep at A (automatic). Most cameras have pretty intuitive white balance gaugers especially when shooting outside, but if you’re for whatever reason dealing with fluorescent or tungsten lighting, you’ll definitely want to just adjust your white balance quickly as your shots will be yellow otherwise! Most cameras have very easy to decipher icons for each one!
Tips for each shooting style: outfits, landscape, details
Outfit or portrait photography
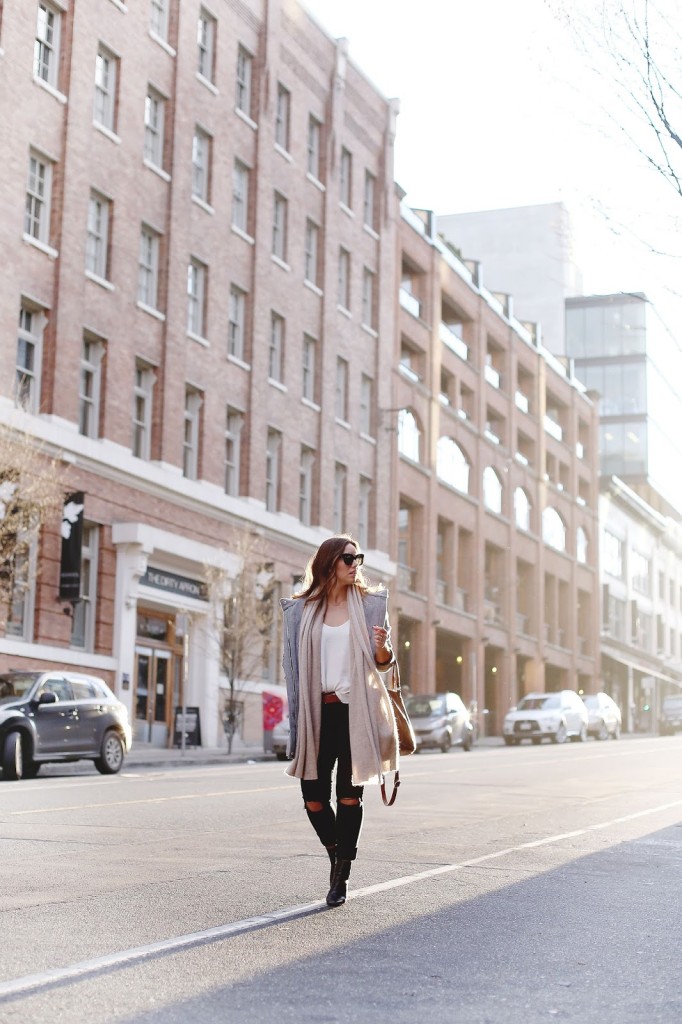 Context, context, context. Personally, I think you should get at least one shot that shows where the person is positioned in their background. It’s what gives that appeal to a full visual story – are they in an urban setting, a beautiful lake, etc? While my outfit shots are pretty standardly focused right on the outfit (other than in a travel context), I still want to bring my readers/viewers into life here in Vancouver and how this outfit suits its surroundings.
 Get low, low, low, low. Whether you’re the photographer or trying to (ever so kindly, of course) instruct your photographer, make sure whoever’s behind the camera gets low. It’s a super easy way to add inches, make for a flattering angle for your frame and in my opinion, makes the whole shot look more editorial as it is.
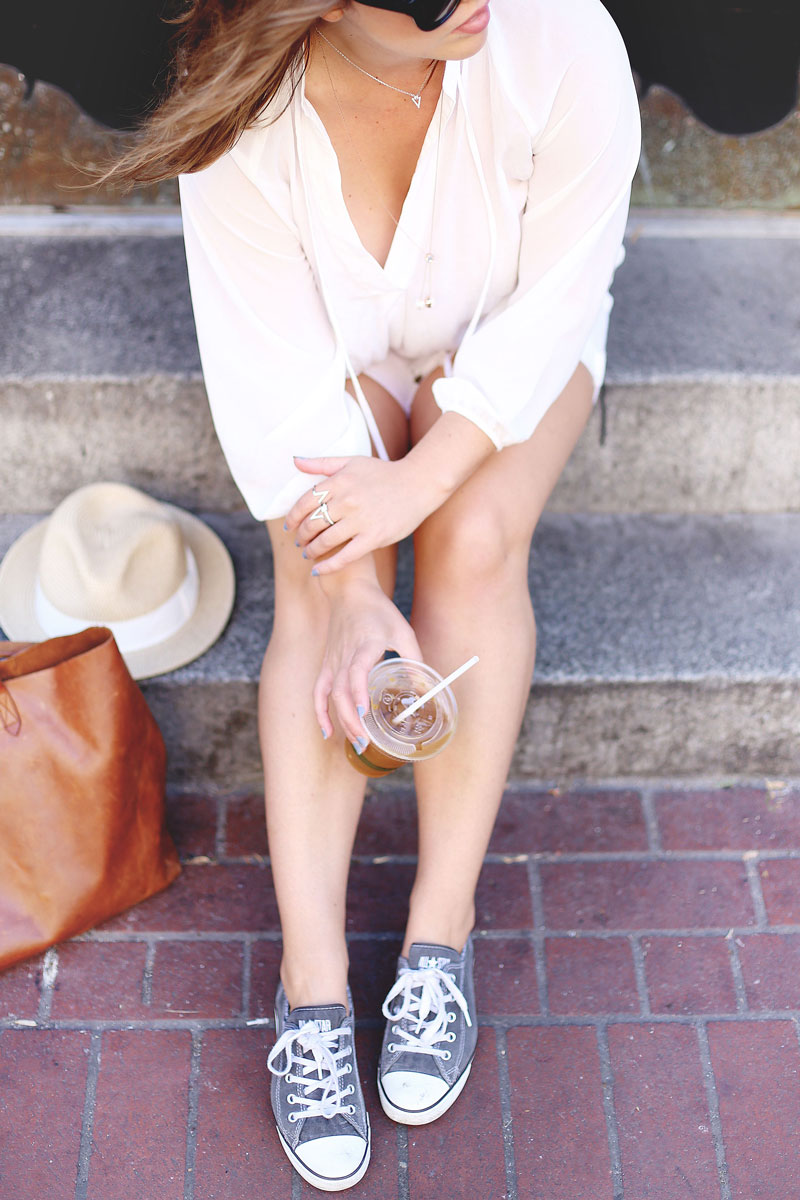 But of course, there’s always an exception to the rule. As you guys might have noticed from my earlier posts, when it comes to details or shooting my fave frame, the “nose-to-toes” as Jill, Alicia and I call it, I actually really like the downward angle. It brings the focus really strongly on the details you’re trying to highlight and a really easy one to get creative with, whether it’s focusing on a watch and getting the jeans, shoes, etc blurred out in the background, sitting for the shot to get a more casual vibe, etc.
Landscape photography
 So I actually went over ton of tips for landscape photography specifically in this travel photography post, but there’s always more to share, especially when it comes to landscape photography! If I have to be totally honest, these are my favourite shots. I love travelling so much and also love my city, and almost every day I stumble upon a scene that takes my breath away whether I’m biking home from a workout at home or adventuring somewhere new. Shooting landscape and sharing it is my way of sharing that one moment of awe.
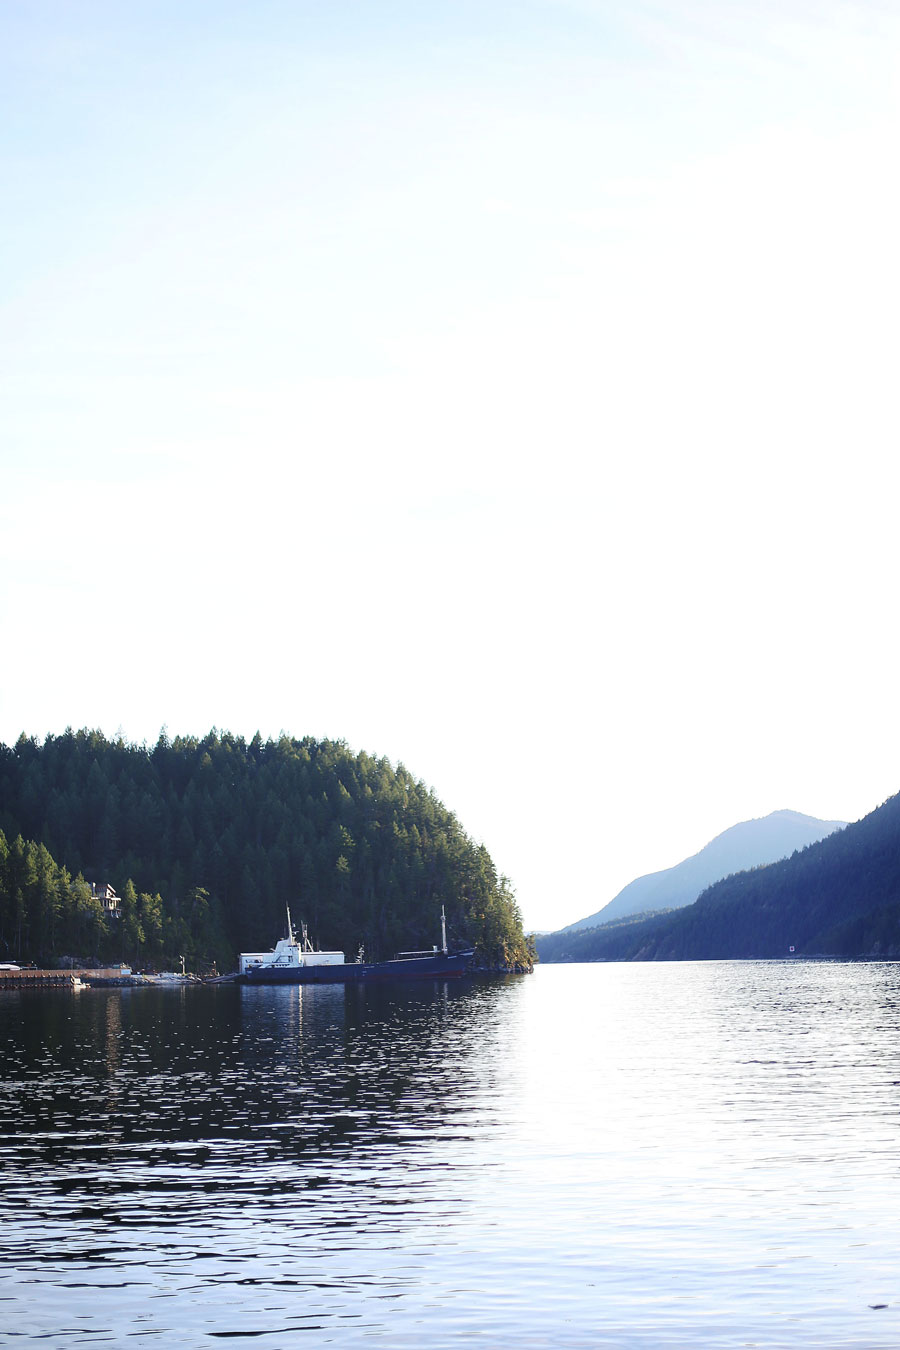
So with that, on to the first tip: layers! Have you ever shot a beautiful, simple landscape (think a horizon) that in real life took your breath away in all its stripped-down beauty only to have it look like nothing more than two blocks of colour on camera? Finding moments when layers intersect and create some linear intrigue makes shots amazing – that’s why even if I’m shooting the most stunning sunset, I usually find a way of bringing something else into the foreground, like buildings, bridges, etc. Of course, we’re blessed with mountains here on the West Coast, so I try to make use of them as much as possible. This shot recently on my Insta is a good example of using layers both in the foreground and in the background!
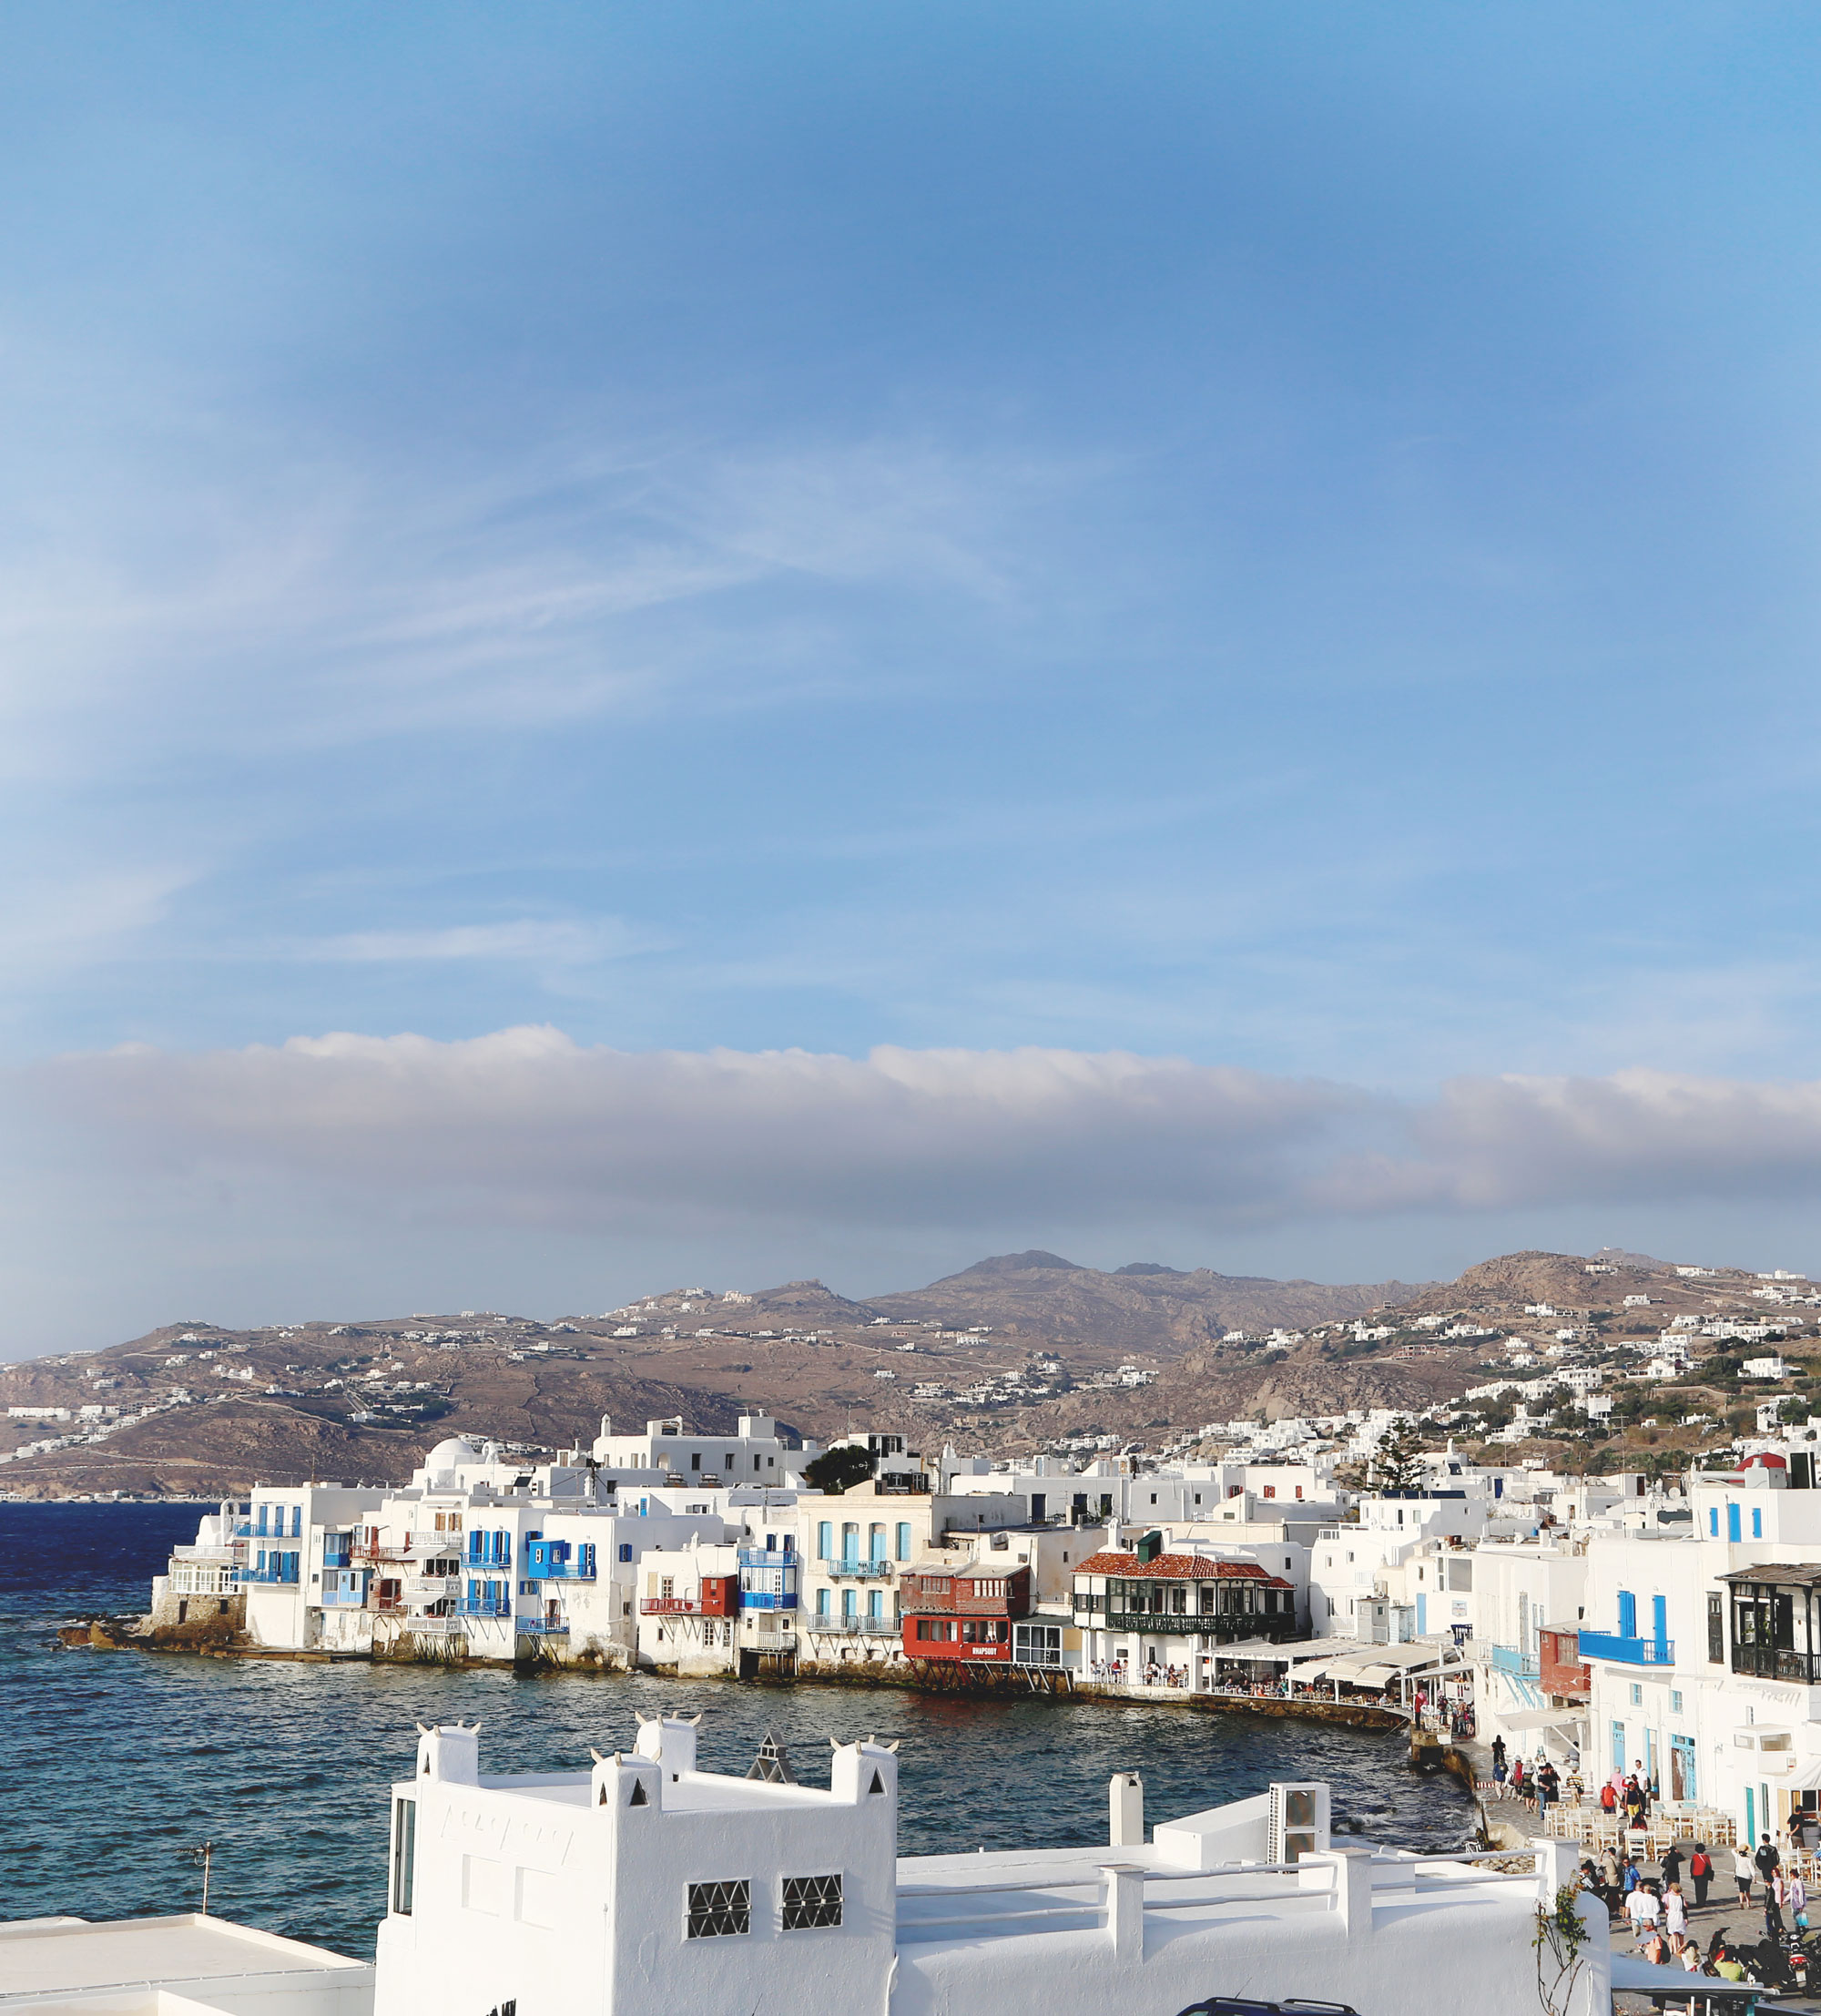 Shoot wide. Like most things, it’s easier to take away the excess than to add what’s not there. This shot of Mykonos is honestly just a fraction of what the original frame was and I’m so glad Matt thought to pack our wide-angle lens for our Greece trip! This is yet another reason I love my Finn the Fuji because it captures a super wide frame.
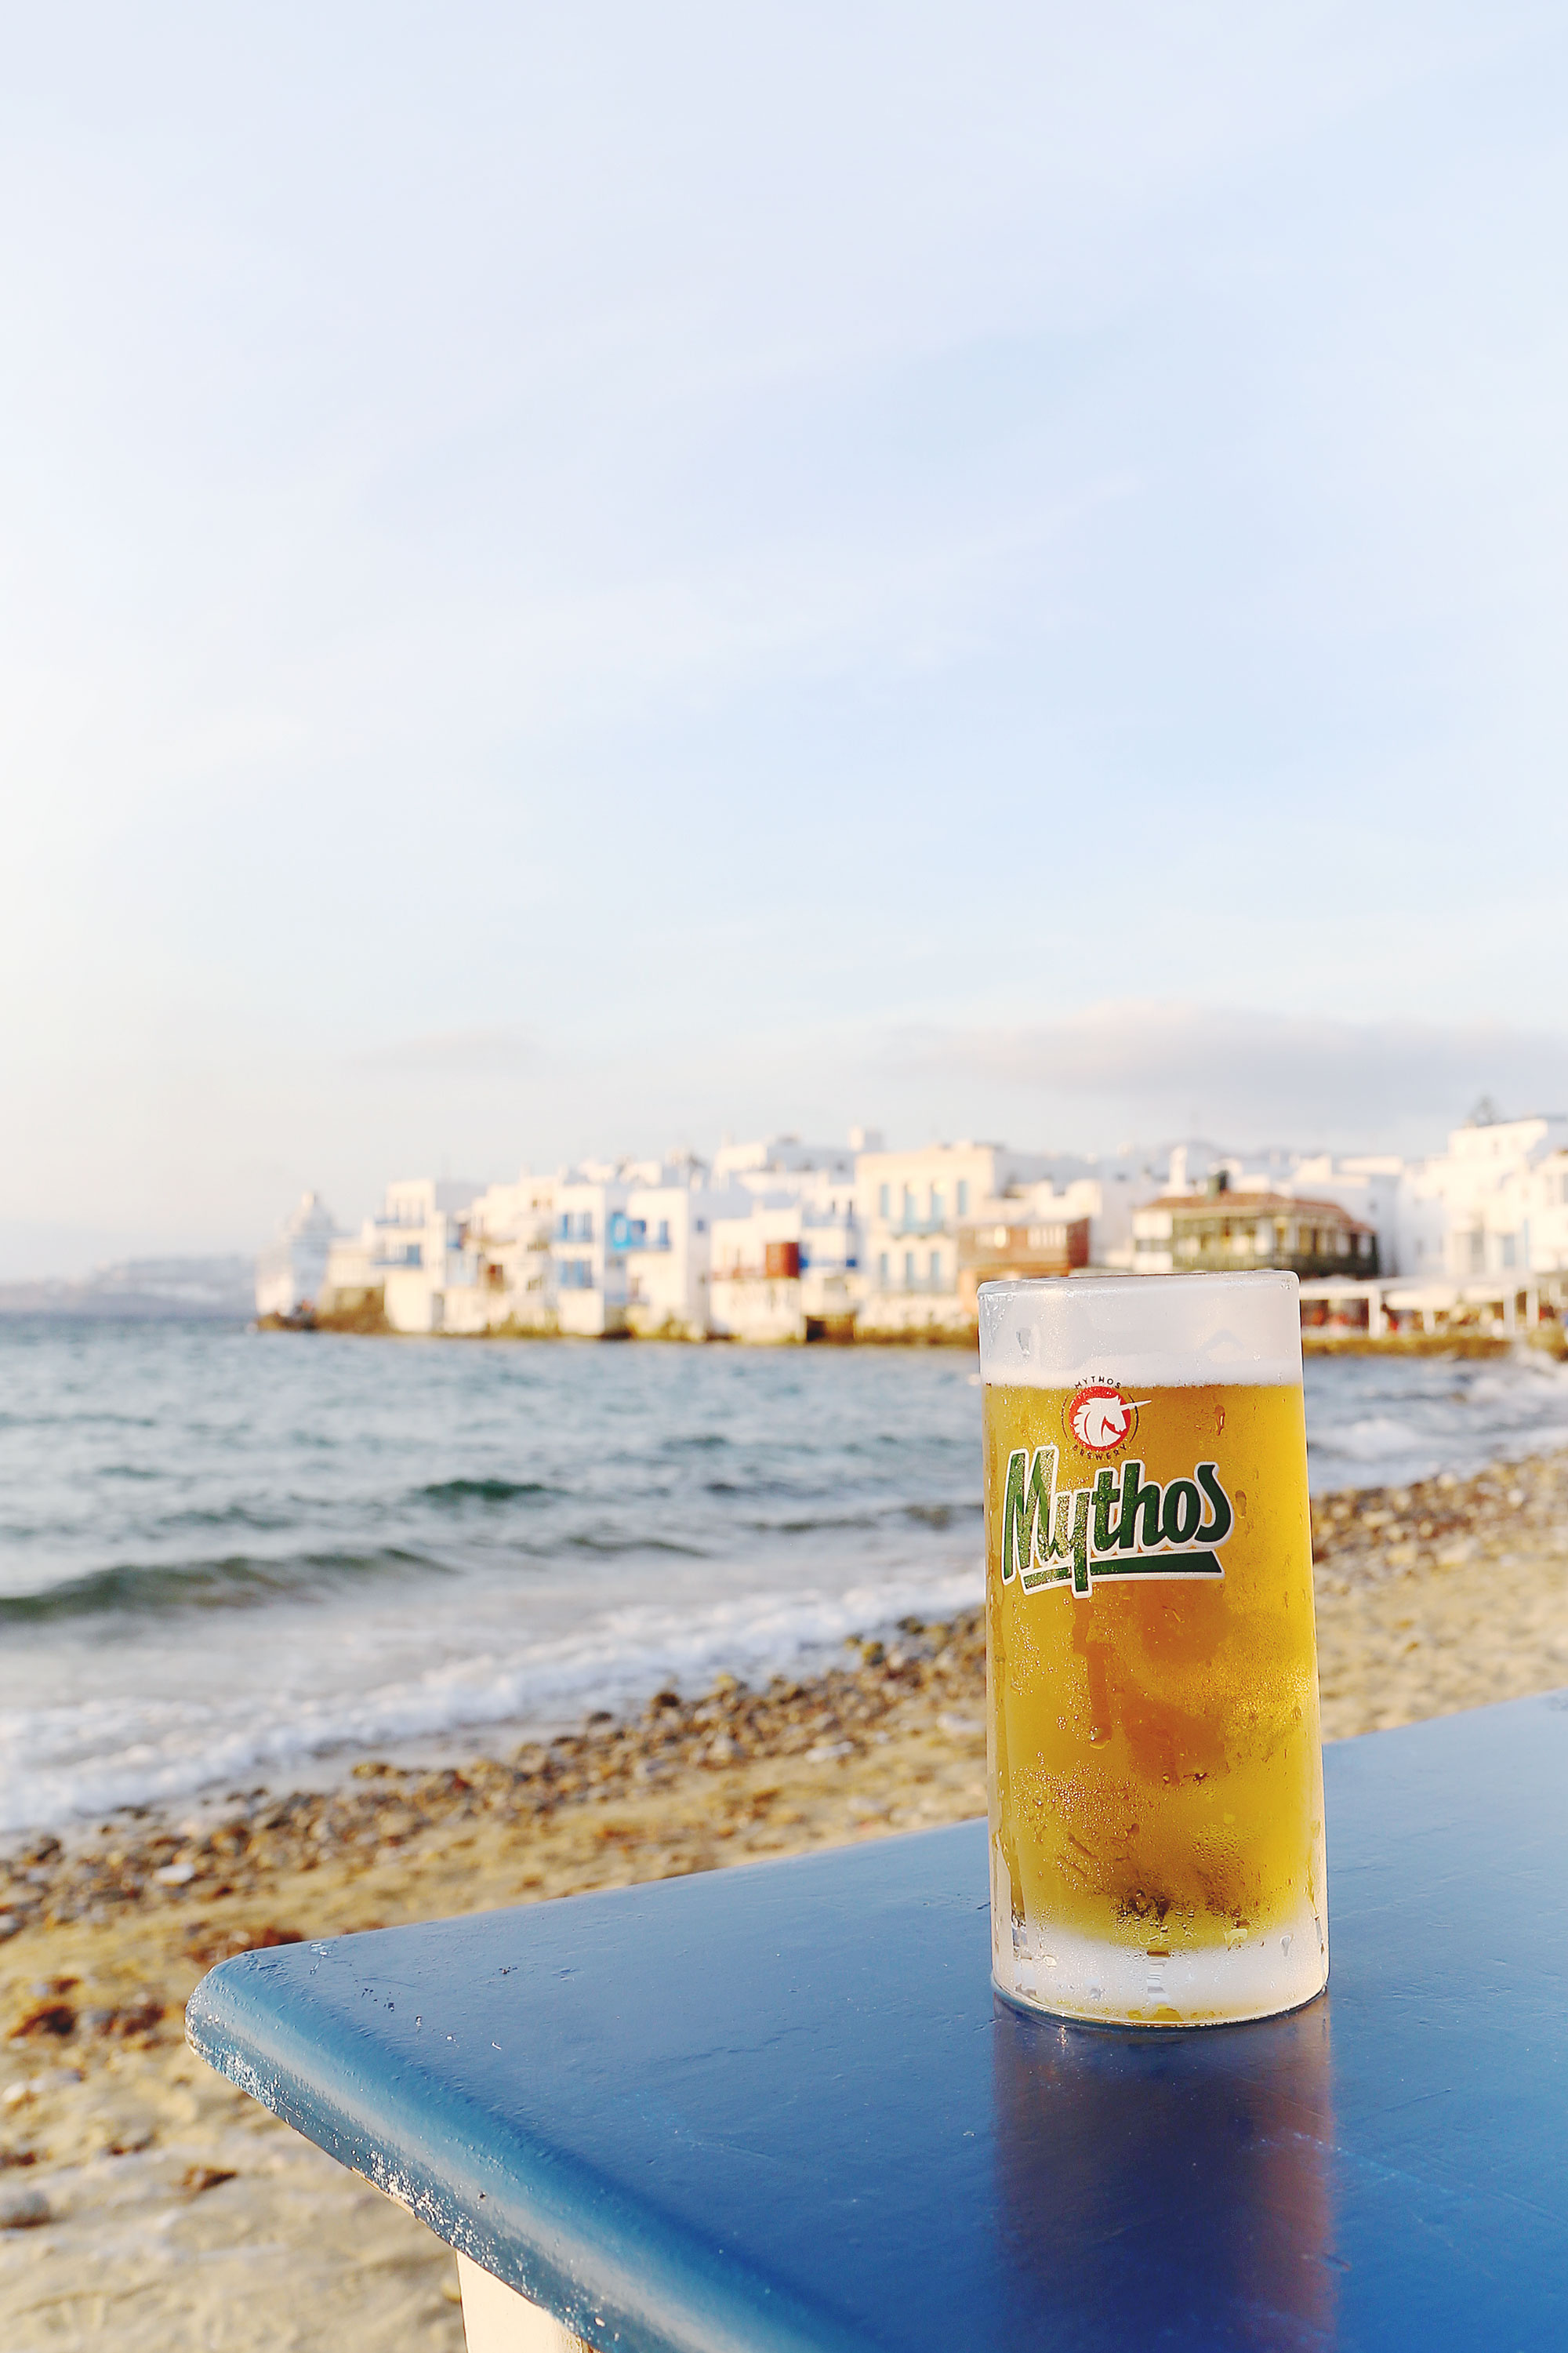 Contextualize it! Just as you add more of the background in for outfit photos in that tip above for outfit photography, when you’re shooting a really vast landscape or even one that’s been done a million times above (I mean, how many shoots of Little Venice in Mykonos are there?), if you can add something into your foreground it just adds more to the story behind the image. Adding in this Mythos beer that we enjoyed while watching the sun go down is (to me at least) more compelling – it feels like I’m there in this very Greek moment.
Detail or flat lay photography
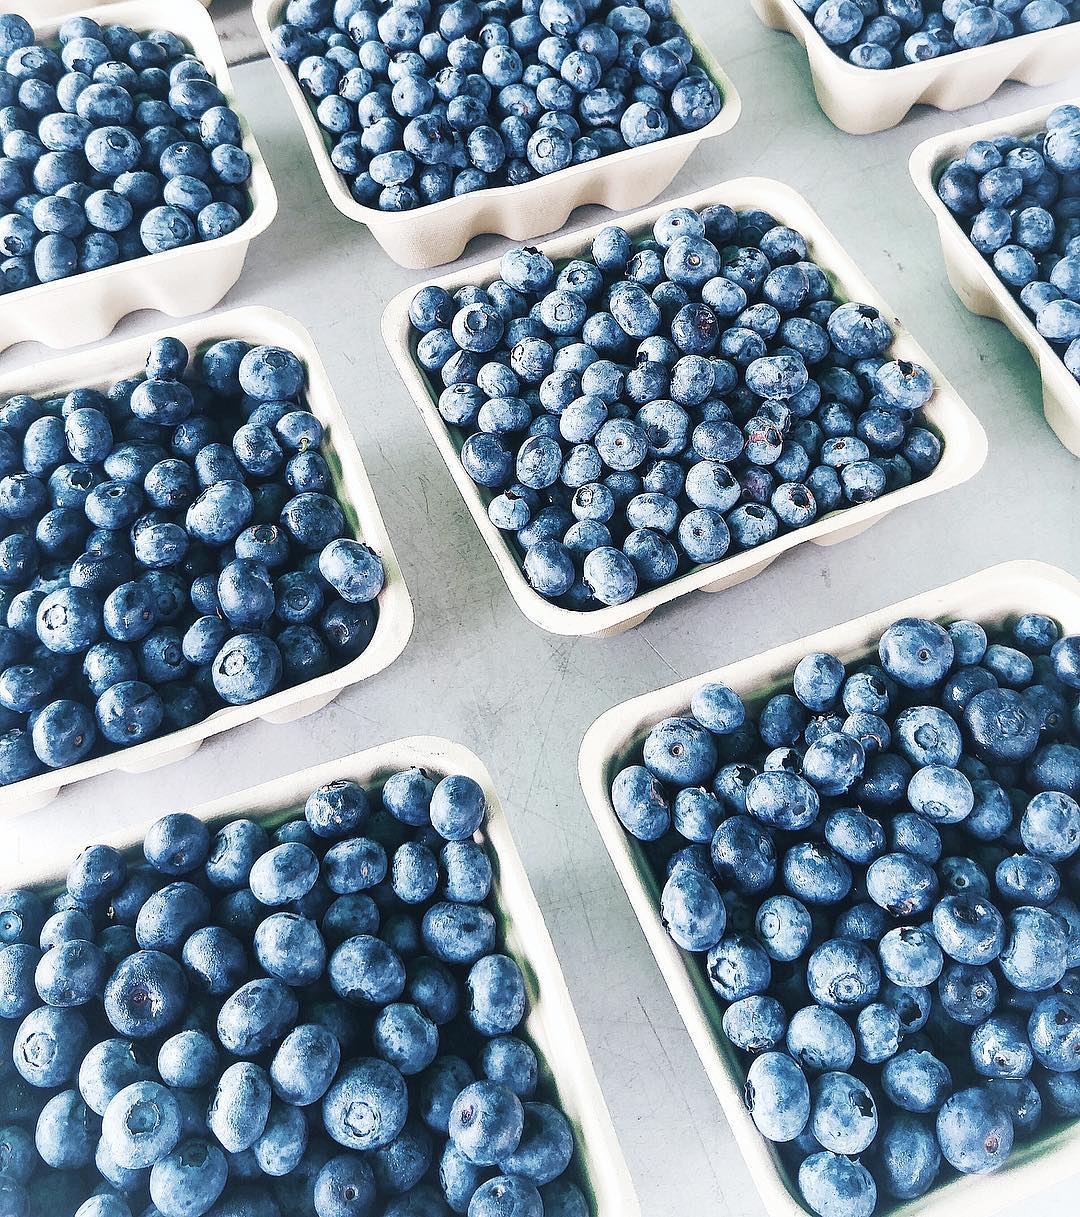 Get above and play with angles. This is one area where phones or a smaller camera like my Fuji excels where SLR’s don’t. You want mobility to here and to be able to simply get above and get the shot close up. I also am a big symmetry fan but I love getting creative with angles – this tilted angle made this shot more visually interesting for me.
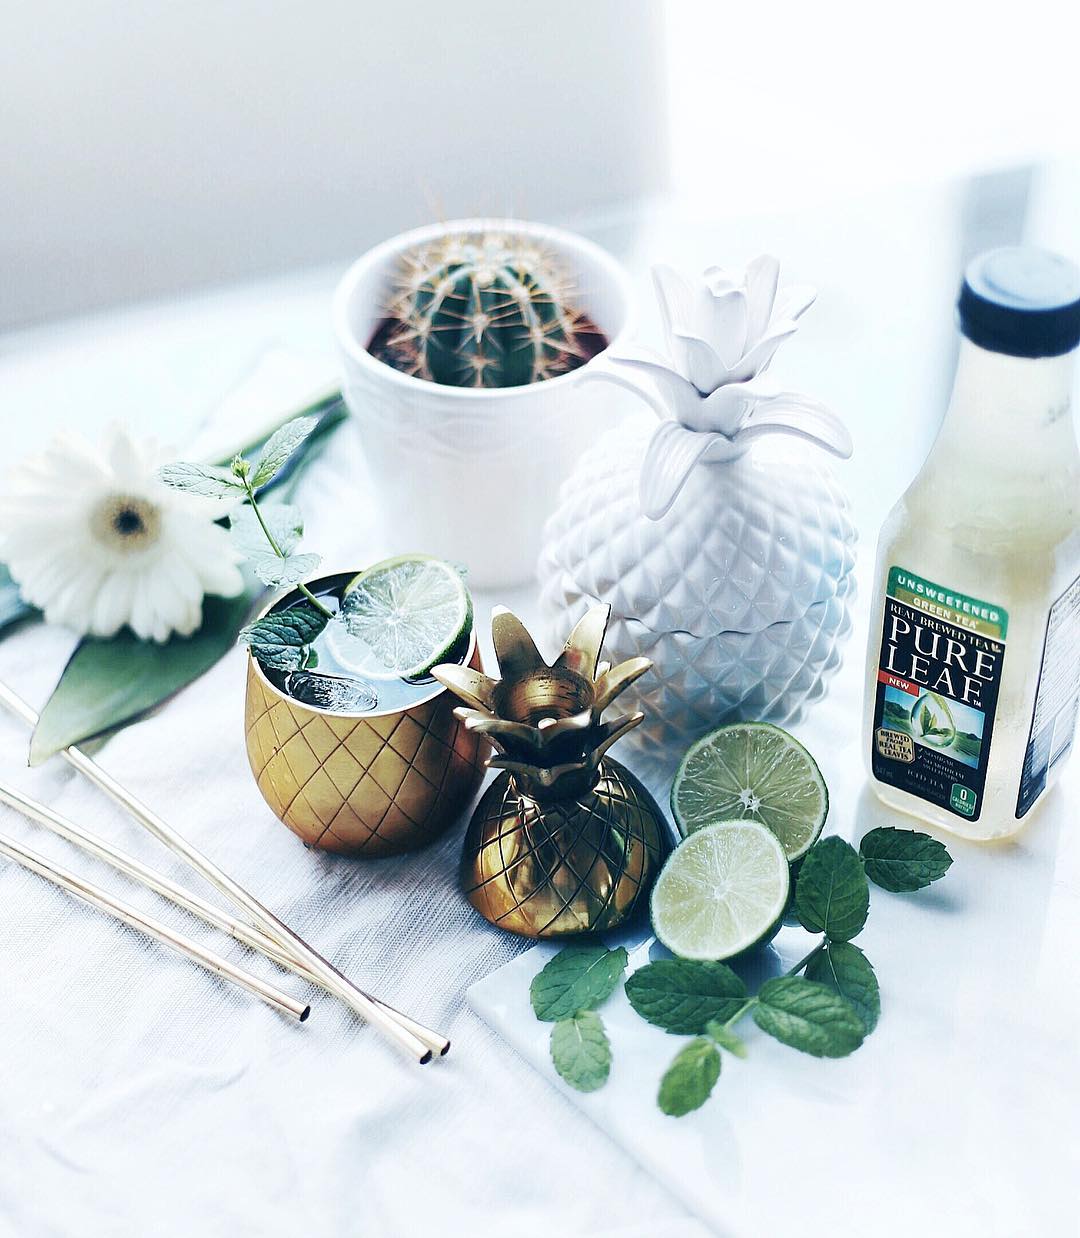 Effortless messiness is key when it comes to flat lays or detail shots. If you’re an amazing folder and can do those incredible perfectly laid out shots then have at it but I’m not skilled enough to do that so instead try to make my shots look and feel abundant, if that makes any sense. Think thematically but have fun with it – what can you throw in the shot? Play around with how you position everything, think of layering napkins, cloths, faux fur, etc – it’s all about texture and layers and details.
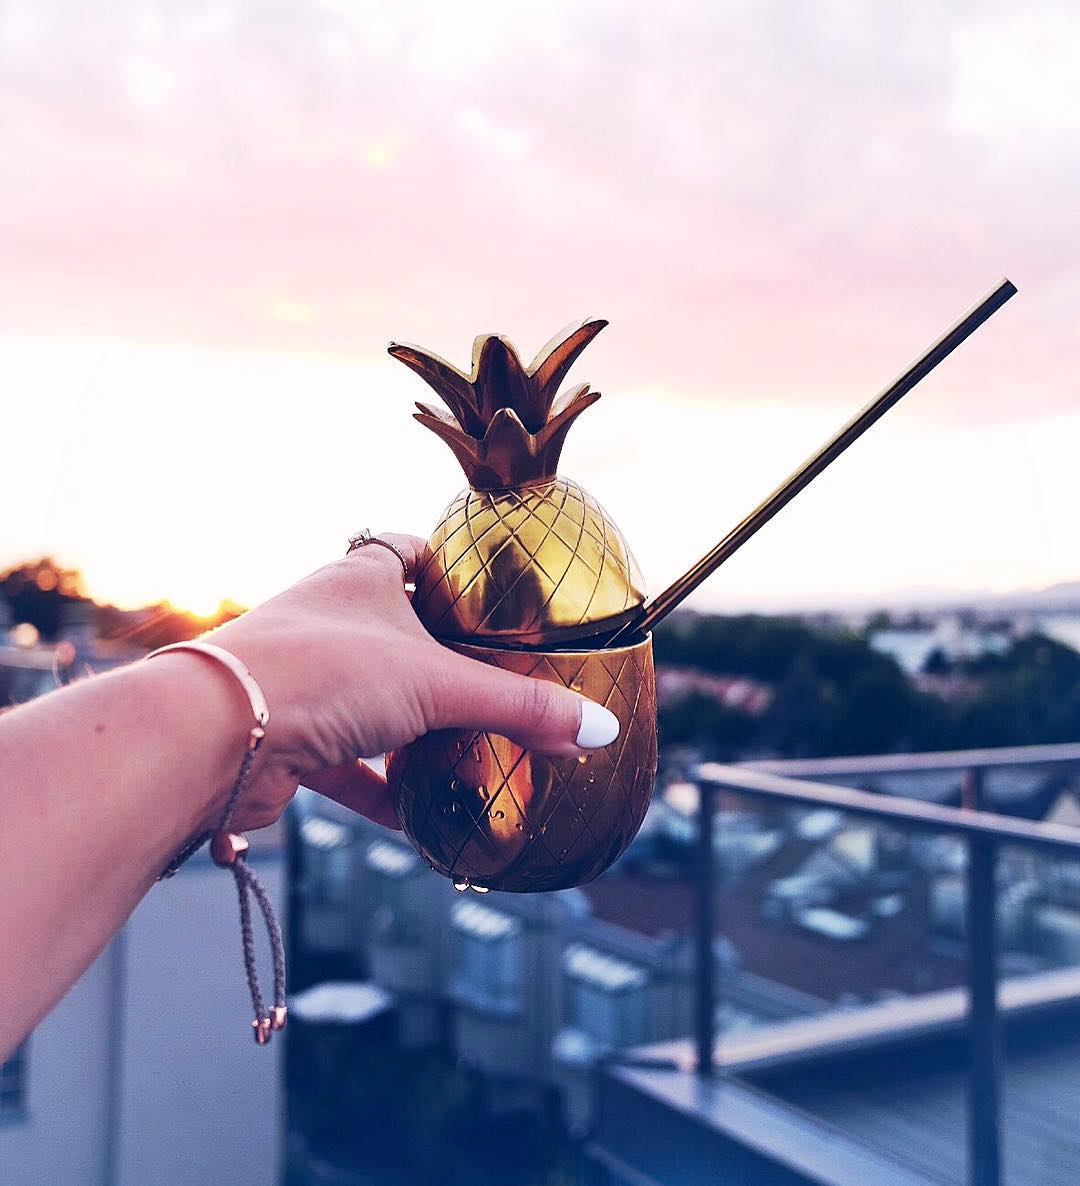 Make it personal! Stuck on how to feature something? My go-to favourite is to simply make myself part of it – whether I’m holding out a glass of wine or cocktail or ice cream cone, it brings your viewer into the shot and also brings you as the photographer into it. It’s why I’m also such a fan of bringing my legs, feet, etc into detail shots. Whether it’s a view from above or a bouquet of flowers resting in my laps, it’s a take on a selfie that really allows for the product to be centre stage.
And with that novel of a post, I’m back to relaxing here at my yoga retreat on Bowen Island! It’s been so incredible and I can’t wait to share the experience with you guys – seriously one of the best things I’ve done in a long time! If you have any other photography Q’s, as always just comment below and I’ll get back to you ASAP (from a very zen’d out spot, of course).

Great tips Alexandra! It’s nice to see different examples of aperture and the type of photos that you can achieve with smaller/larger f-stops. I’m learning a lot more about photography at the minute so this is really useful. Thanks!
http://www.golivexplore.com
Thanks so much Alicia that means so much! xo
Thanks so much for this post! There’s so much to learn in the world of photography and I really like how you went into details about things!
Polly
http://gemsandjoy.com
Aw so glad it helped! I honestly never stop learning, it’s such a fun thing to keep exploring! xo
These photographs are incredible! absolutely cool!
Thanks so much!
This was such an incredible post!! I’ve been becoming more and more of a photography nerd, so I love reading how other people shoot.
I still have a Canon t3i and an inexpensive lens and it’s been great, but I really want a Canon 6D and a better lens. I can’t justify the purchase YET.
Jackie
Something About That